

 Español

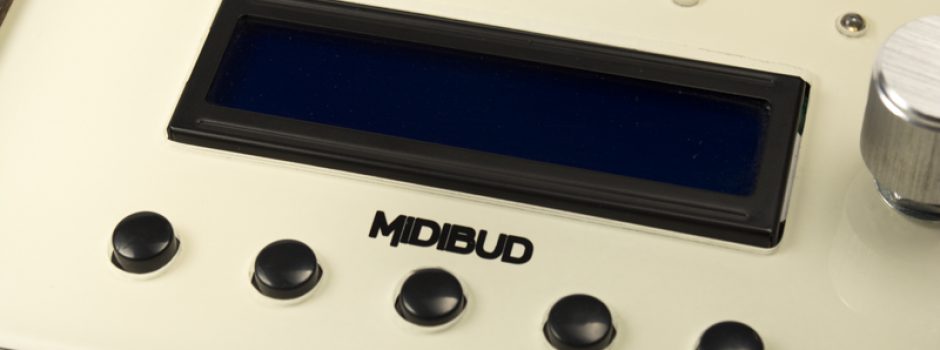
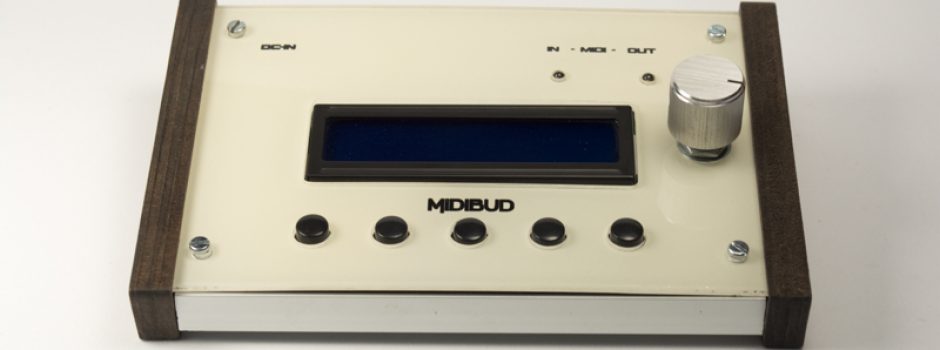
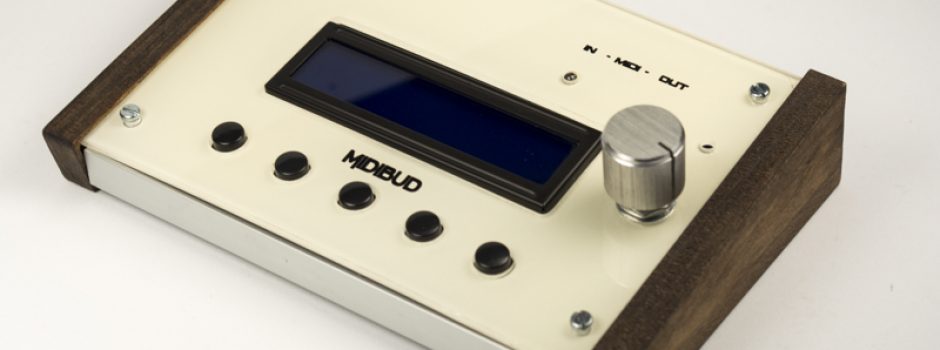
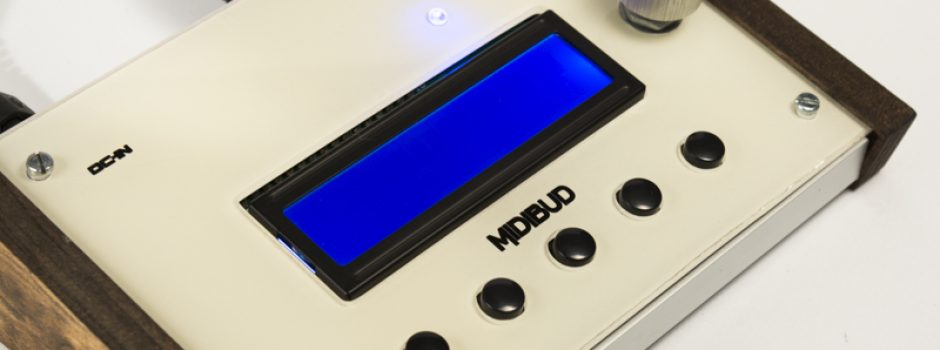
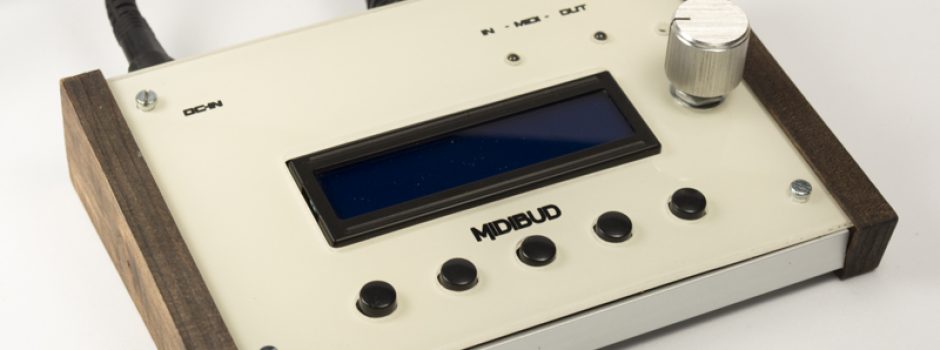
MidiBud is a DIY MIDI controller with a 16×2 display, EEPROM, push-button encoder and 5 buttons. The design is based on the Mutable Instruments MIDIpal. This is a revision of the board made by the Midisizer guys, so you can order your own PCB + Atmega Pre-programmed, get the list of components and build your own!!
What is MIDIPAL?:
The MIDIpal is a smart little MIDI processor. Insert it between a MIDI keyboard (or sequencer) and a MIDI sound device to discover powerful effects and composition tools.
Composition tools:
- Keyboard-controlled drums sequencer. Control a drum module from a keyboard by triggering and combining patterns — one for each key of a 49 keys keyboard. Create mesmerizing Euclidean drum patterns.
- Note randomizer: Randomize note values, velocity, and send random CC at each key press.
- Chord memory: Enjoy the classic chord memory feature of early 80s synths.
- Arpeggiator: Arpeggiate your chords. 4 modes (up, down, up&down, random), 15 rhythmic patterns, adjustable tempo, rhythmical division, gate and groove, syncable to MIDI clock.
- Delay: ay ay ay… Up to 32 echoes added after each note, transposition and velocity adjustment for creating feedback arpeggio effects, syncable to MIDI clock.
- Scale: Never miss a note in a solo… The scale mapper replaces each note you play by its nearest neighbour in one of the 25 preset scales.
- Step sequencer: The tiniest step sequencer! Up to 32 step can be sequenced, with note duration, note value, velocity, and CC control at each step.
MIDI Message generation:
- Clock: Make your MIDI setup groove! MIDI clock source with adjustable tempo and adjustable groove/shuffle/humanization patterns, from super-tight to funky.
- CC LFO: Generate up to 4 tempo-synced LFO and cyclic automation movements for any MIDI Control Change (CC) message.
- CC knob: Use the MIDIpal as a knob to send any CC or NRPN message.
- Controller: Up to 8 sensors / potentiometers (or any voltage source) can be connected to the MIDIpal board, turning it into a versatile “brain” for sensing applications.
- Ear training game: A fun note / interval recognition game.
MIDI Plumbing:
- Monitor: Sometimes things go wrong with a MIDI setup… Use the MIDIpal as a trusted source to display the stream of MIDI messages coming from a cable.
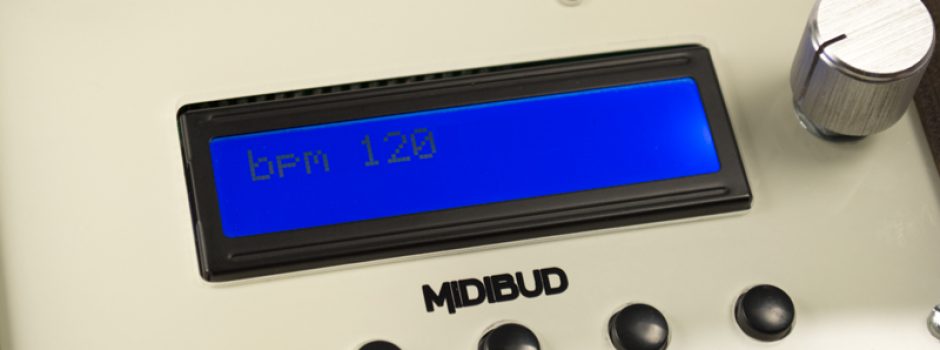
- BPM counter: Use the MIDIpal to check the accuracy of a MIDI clock signal coming from a sequencer or drum machine.
- Channel filter: Remove all MIDI messages coming from a specific channel.
- Splitter: Control several synths from a single keyboard by routing one half of the keyboard to a MIDI channel, the other half to another.
- Dispatcher: Play a rack of monophonic synths like a polysynth. The MIDIpal will automatically route each note of a chord to a differentMIDI channel.
- Channel Merger: Merge several MIDI channels into a single MIDI stream.
- Clock divider: Create a slower subdivision of a MIDI clock.


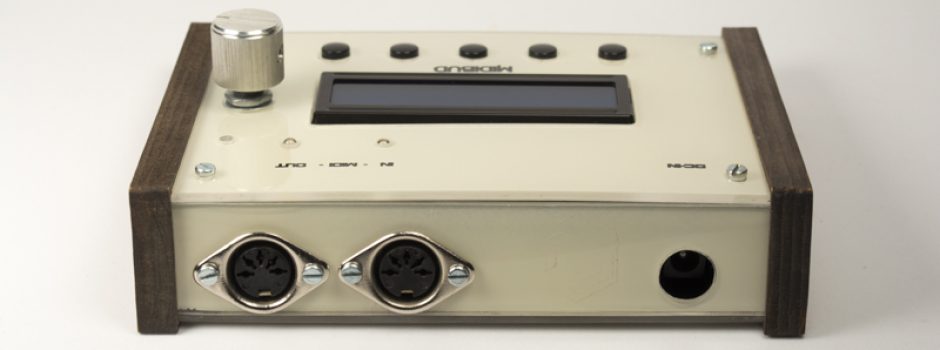
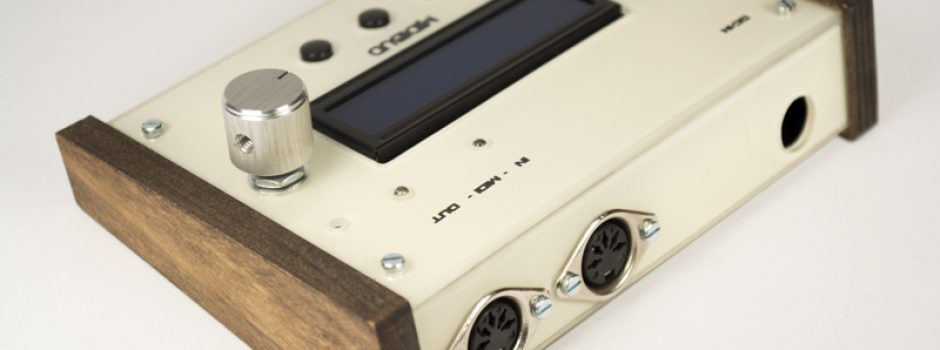
CNC enclosure build:
For this occasion I have decided to use what I have learned in the last projects, combining the idea of ETHERUS and the first CerebelUSB case. The main panels are made of acrylic, spray painted, then CNC drilled and engraved, then painted black again for a nice contrasting text.
The side panels are not just for freaking out… They are actually what keep the entire case in one piece, like a puzzle, I love this way of designing cases.
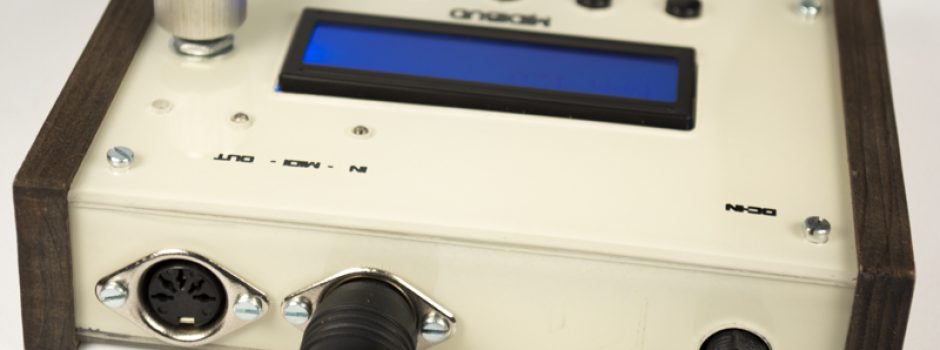
I’ve had to wire the MIDI connectors off the board so I can fit them in accordingly, they should go on the top but this makes it impossible to close it off with a case. The same is also true of the power connector, which has been reversed to the bottom of the PCB.
Files:
Due to the number of people asking me for these files for CNC, despite my comments about the difficulty. Here I leave DXF files for the wooden front, back and sides. Enjoy!
I’ve been looking at the MidiBud– but I’d potentially like to buy some of these cases– I don’t suppose they’re available off the shelf somewhere?
Hello Zinc. You are correct, this case is not available anywhere as I made it for my personal use and as an experiment for building new cases. The whole design is nice looking but not practical. First you must put the MIDI connectors and DC Jack on the bottom side of the PCB, or else it wont fit.
I decided to use “wired” connectors resulting in a wicker design for plugging and un-pluggin the cables. It could be improved using Alluminum or bending the acrillic/perspex… so if I ever improve it I will release propper files for DIY users.
I would love to get DIY files for these. I know one has to resolder the MIDI plugs underneath and rewire everything but I think it’s worth the hassle if it means you can house the MIDIBud in such a lovely case. Excellent work as always inspektor, looking forward to more!
Hey Konstantine, thanks for your words!! I will try to look in my “archive” and see if I find at least the Front panel and the Side panels… the rest I made it with no CNC but cutting the “acrillic” using a blade for marking and breaking it like glass. Will prepare the files as DXF and I will add them as download at the bottom of this Post. All the best!
Hi Konstantine… Link to the DXF files added to the bottom of the post… Hope it helps! Cheers!
Hi would you sell me a midibud case?
Hello.. would you sell me a midibud case?
Cheers
Hello Tommy,
Yest I can, it would be ideal if let say you have a few friends interested in a case too, that way I can make them in bulk and cheaper.
Send me a PM through the contact section of this website in cse you are interested.
Regards,
Julian